Roku Stick Setup: Complete Step-by-Step Instructions
Setting up a Roku Streaming Stick is one of the easiest ways to start streaming free TV—especially if you’re new to streaming or switching from cable. In this guide, you’ll go from unboxing to watching your first show in about 15 minutes, with clear steps and simple fixes if something doesn’t look right.
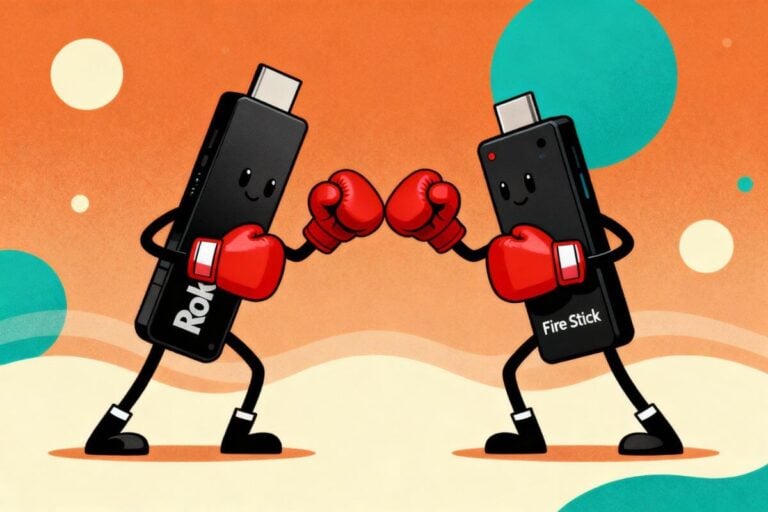
If you’re still deciding between devices, I also compare Roku vs Firestick so you can see which one is easier to use and better for classic TV before you buy.
Once your Roku is working, you can follow my complete guide to where to watch old TV shows for free and my beginner guide to setting up any TV for streaming, even older non‑smart sets.
What You Need Before You Start Your Roku Stick Setup
Before you unbox your Roku Streaming Stick, grab these basics. Having everything ready prevents the most common setup frustrations.
When we moved to Florida, I had to set up a Roku in our bedroom so we could unwind with Netflix at night. I’m not technical at all, so I was nervous I’d plug something into the wrong spot or end up with a blank screen. But once I took a breath and followed the steps one at a time, it wasn’t nearly as intimidating as I expected.
When that Roku home screen finally popped up, I felt like I’d climbed a mountain. If I can get a streaming stick working without any tech background, truly anyone can.
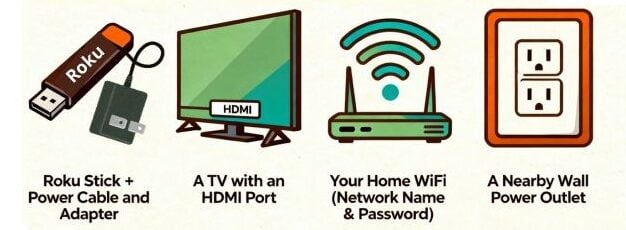
Required
- Roku Streaming Stick + the included power cord and wall adapter
Use the wall outlet for power (not the TV’s USB port). TV USB ports often don’t provide consistent power and can cause random restarts or “no signal” issues. - A TV with an HDMI port
Most TVs from about 2010 and newer have at least one HDMI input (often labeled HDMI 1, HDMI 2, etc.). You’ll plug the Roku Stick directly into HDMI. - Your Wi-Fi network name and password
You’ll need the network name (SSID) and password exactly as written (passwords are case-sensitive). - A nearby wall outlet
The Roku power cable needs to reach a wall outlet close to the TV.
If your TV does not have HDMI (older TVs)
If your TV only has the red/white/yellow inputs, you can still use a Roku Stick, but you’ll need an HDMI-to-AV (RCA) adapter that converts HDMI into those older connections. After connecting, you’ll set your TV input to AV (instead of HDMI).
Optional but helpful
- Your phone or tablet nearby
It can make setup easier, and later you can cast videos from your phone to the TV when you want a bigger screen. - A free Roku account (created during setup)
You need this to activate the device and add channels. You can use Roku with free apps without entering a credit card.
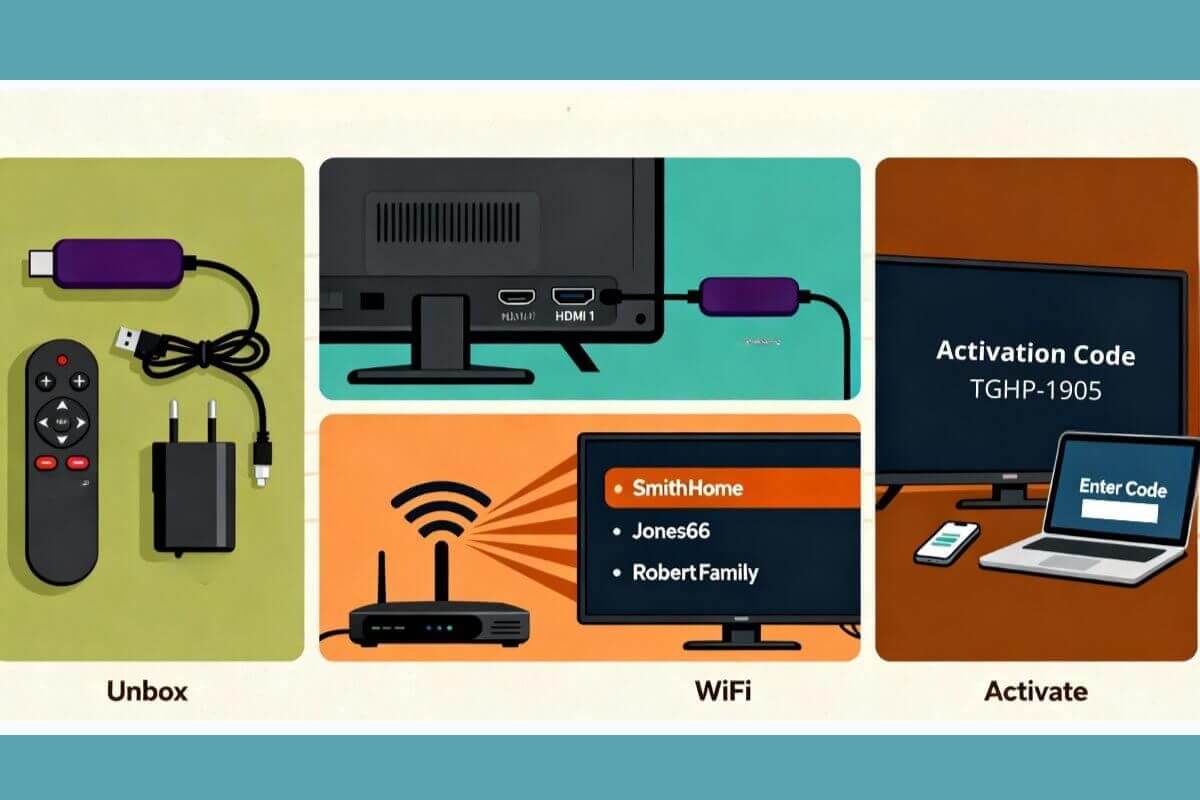
How to Set Up Your Roku Streaming Stick
Follow these steps in order. If you get stuck, the quick checks under each step handle most problems.
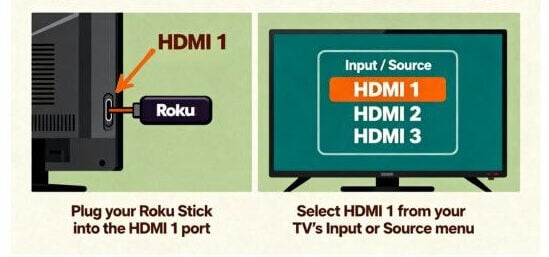
Step 1: Unbox and connect the Roku Stick to your TV
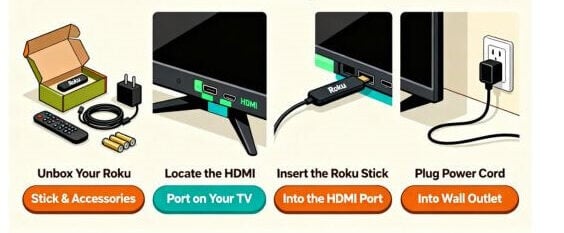
- Open the box and take out: the Roku Stick, the USB power cable, the wall power adapter, and the remote (with batteries).
- Plug the Roku Stick into an HDMI port on your TV (HDMI 1 / HDMI 2 / HDMI 3).
- Connect power the right way:
- Plug the USB power cable into the Roku Stick
- Plug the other end into the wall power adapter
- Plug the adapter into a wall outlet
Important: Do not power the Roku from your TV’s USB port. It can cause restarts, freezing, or a blank screen.
Quick check if you see nothing yet: that’s normal—your TV may just be on the wrong input. Go to Step 2.
Step 2: Select the correct HDMI input on your TV
- Turn on the TV.
- Press the Input / Source button on your TV remote.
- Select the same HDMI number you used on the back of the TV (HDMI 1, HDMI 2, HDMI 3).
- When you choose the correct HDMI input, you should see the Roku welcome screen.
If you still don’t see Roku:
- Push the stick in gently to make sure it’s fully seated in HDMI
- Confirm the Roku is powered from the wall outlet
- Try a different HDMI port, then switch the TV input to match
🎯 Tip: Remember which HDMI port you used
If you ever switch TV inputs and lose the Roku screen, you’ll need to return to the same HDMI number you used during setup (HDMI 1, 2, or 3). Many TVs label the ports on the back, but you can also rename the input in your TV settings (for example, “Roku”) to make it easier to find later.
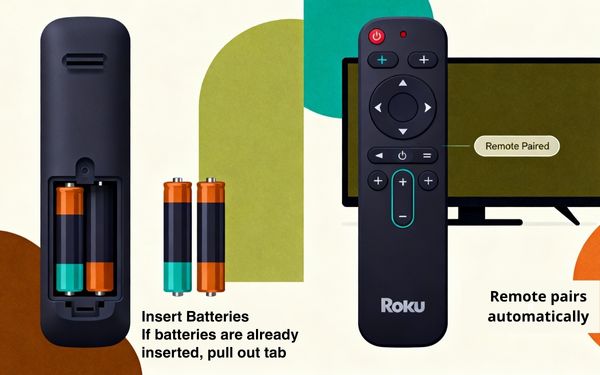
Step 3: Pair your Roku remote
Most Roku remotes pair automatically within a few seconds. Start here:

- Insert the batteries (or remove the battery “pull tab,” if your remote has one).
- Point the remote toward the TV and wait for the on-screen pairing message.
If it does not pair automatically:
- Open the battery compartment and look for a small PAIRING button (often recessed).
- Press and hold it for 3–5 seconds until the pairing light flashes.
- Wait for the on-screen confirmation.
Quick checks if the remote still won’t respond:
- Re-seat the batteries (match + and – correctly).
- Try fresh batteries.
- Move closer to the TV and remove anything blocking the stick/TV area.
If your remote does not respond during setup, try these fixes for a Roku remote that is not working.
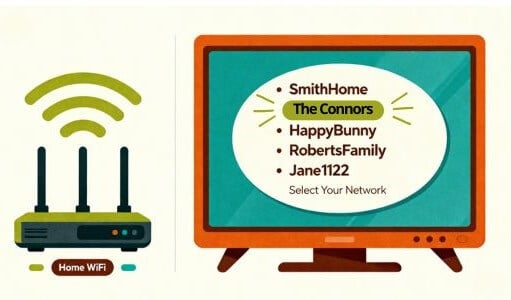
Step 4: Connect your Roku to Wi-Fi
You need Wi-Fi to add channels and stream free apps.
- On the Roku screen, select Wireless when asked how you connect to the internet.
- Choose your home Wi-Fi network from the list (your SSID).
- Enter your Wi-Fi password using the on-screen keyboard.
🎯 Passwords are case-sensitive (capital and lowercase letters must match exactly).
If typing is difficult, use the Roku mobile app later for easier typing—however, you can complete initial setup without it.
If you cannot connect:
- Network not listed: restart your router, then re-scan.
- Wrong password: re-enter carefully (watch capitals).
- Connection drops: move the Roku temporarily closer to the router to test signal strength.
Step 5: Activate your Roku (create/sign in to your Roku account)
To finish setup, Roku will show an activation code on your TV.
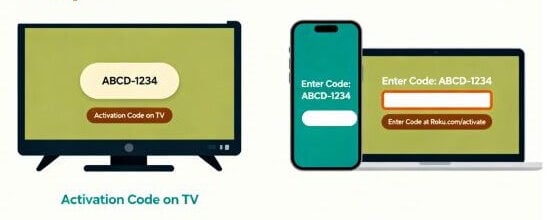
- Write down (or photograph) the activation code shown on the screen.
- On your phone or computer, go to the activation page shown on your TV screen and enter the code.
- Create a free Roku account or sign in if you already have one.
📌 Key points:
- You can use Roku with free apps without paying monthly fees.
- Avoid adding payment info unless you intentionally plan to subscribe to paid services.
Step 6: Finish initial settings (recommended choices)
Roku will walk you through a few preferences.
Recommended:
- Theme: choose whichever is easiest to see.
- Skip paid trials: you do not need them for free classic TV.
- Enable captions if you like: captions help with clarity, especially on older shows.
If voices still sound quiet or buried under music once you start streaming, use this free fix (works even before buying any gear).
Do I need glasses / captions / larger text?
If menus feel small or hard to read, choose the high-contrast theme and enable closed captions during setup. Captions can be turned on or off anytime and are especially helpful for older shows with uneven audio.
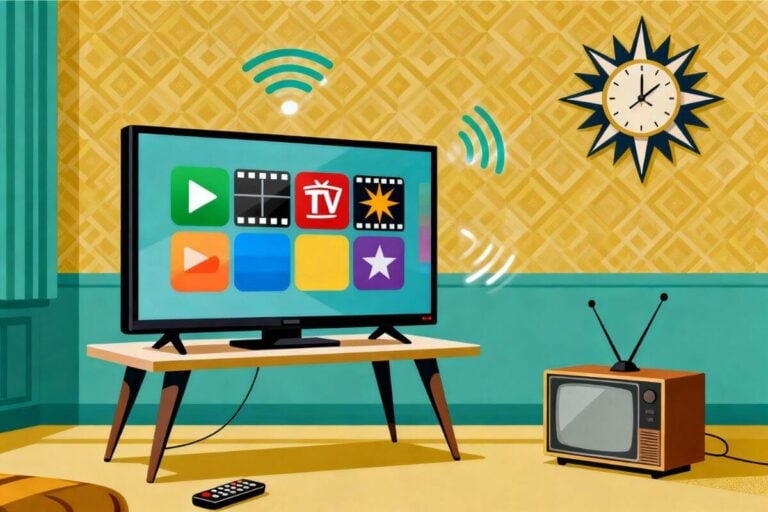
After Setup: Add Your First Free Apps (TUBI + More Options)
Once you see your Roku home screen, you’re ready to add channels.
Once you see your Roku home screen, you’re ready to add channels.
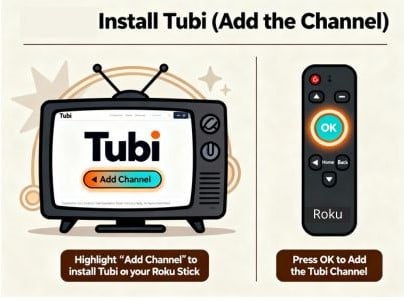
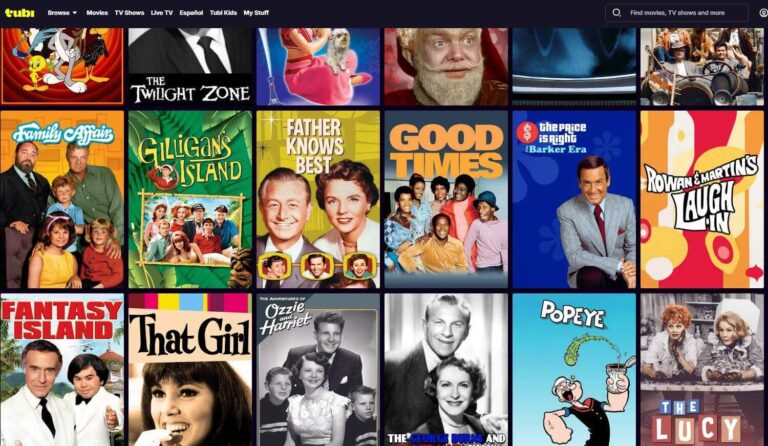
Begin by Installing Tubi
Tubi is a good starting point because it’s easy to search by title.
- From the Roku home screen, go to Streaming Channels (or Add Channels).
- Choose Search Channels and type Tubi.
- Select the official Tubi app and click Add Channel.
For pictures and more detail, follow my step‑by‑step Tubi setup walkthrough that shows how to install Tubi on any TV, including Roku.
Start Viewing Your Favorite Shows
Once your Roku is set up and you’ve added a few free apps, it helps to have a “first show” to try so you can see everything working. If you like mystery and classic 70s TV, I explain where to watch the Columbo TV series today, including free options you can open right on your Roku.
If you want the big picture across several free apps (and where older shows tend to show up), read about where to watch classic shows for free.
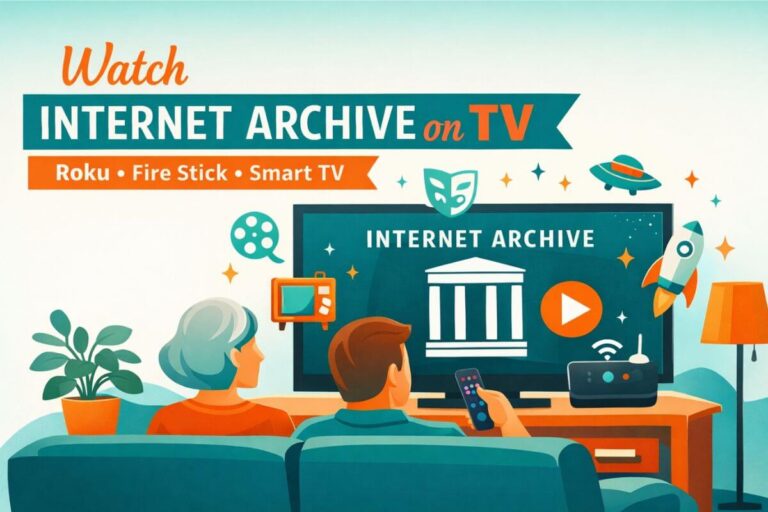
Finally, if you enjoy rare finds and public-domain classics, we walk you through how to watch Internet Archive on TV (Roku, Fire Stick, and Smart TVs.
Watch From Your Phone (Casting/Mirroring)
If you ever want to send a video from your phone to the TV (or mirror your screen), it’s easier than it sounds. Here’s the simple version, then your link can send them to the deep dive. You can use a feature called casting or screen mirroring.
As long as your phone and your Roku are on the same Wi‑Fi network, you can open a streaming app on your phone, tap the Cast icon, and pick your TV from the list. On many phones you can also mirror the whole screen, so anything you see on your phone shows up on the TV.
For step‑by‑step help with iPhone, Android, Roku, Fire Stick, and smart TVs, this guide covers all devices and methods.
Quick Troubleshooting (Most Common Issues)
No picture / “No signal”
- Confirm the Roku is plugged into HDMI firmly.
- Confirm it’s powered from a wall outlet (not TV USB).
- Switch TV input to the matching HDMI number (HDMI 1/2/3).
- Try a different HDMI port.
Remote not working
- Remove and re-insert batteries (match +/–).
- Try fresh batteries.
- Re-pair using the pairing button inside the battery compartment.
Wi-Fi problems
- Restart the router (unplug 30 seconds, plug back in).
- Re-enter password carefully (case-sensitive).
- Move closer to the router temporarily to test the signal.
Better Sound (If You Need It)
If you want clearer dialogue without turning the TV volume way up, wireless TV headphones are the most reliable upgrade.
Frequently Asked Questions
Does Roku streaming stick work on older TVs?
Most older TVs with HDMI ports (from 2010 onward) work fine. If your TV predates HDMI, you’ll need an inexpensive HDMI-to-AV adapter. For detailed guidance, see our guide on how to use Roku for an older TV.
Can I use my TV remote to control Roku?
Your TV remote controls the television (power, volume, input). Your Roku remote controls the Roku itself. Some newer TVs support HDMI-CEC, which lets your TV remote control the Roku—check your TV manual. For most users, use the Roku remote for streaming control.
Do I need a credit card to use Roku?
No. Free channels like Pluto TV and Tubi require no credit card. You only need a credit card if you choose to subscribe to premium services (which is optional). Thousands of classic TV shows are available completely free.
What free streaming services work on Roku?
Pluto TV, Tubi, Internet Archive, Roku Channel, and many others are completely free. See our complete comparison: [Link: Best Streaming Apps Free: 10 Apps for Classic TV Fans].
How do I add channels after setup?
On your Roku home screen, select “Streaming Channels,” search for the app you want, and press OK. The channel downloads and installs automatically.
How do I get classic 60s and 70s shows on Roku?
Install Pluto TV or Tubi (both free). Both apps feature extensive collections of classic television organized by decade. Search for specific shows or browse by category.
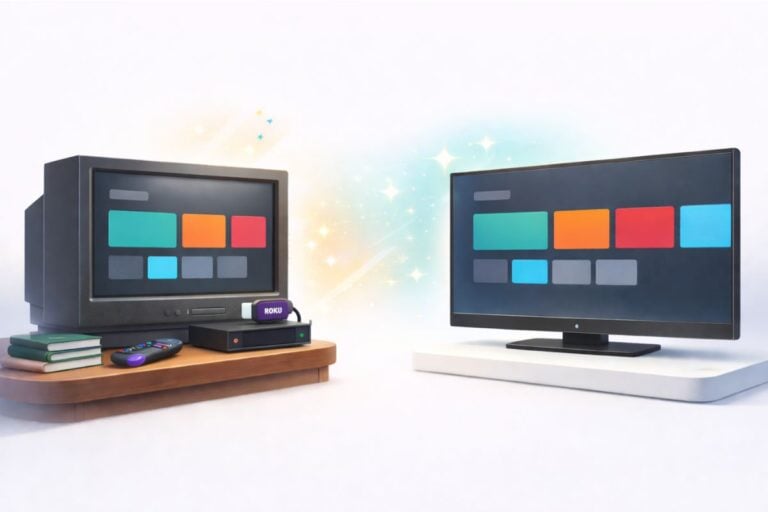
Can I watch on more than one TV?
With a single Roku account, you can use one Roku Stick at a time. If you want Roku on multiple TVs, you’ll need a separate Roku Stick for each TV. Each Roku registers to your account independently.
Can I use a Roku Stick on an older TV?
Yes, if it has HDMI; if not, you can use a small HDMI-to-RCA converter. Our walkthrough explains all you need to know about streaming sticks and older televisions.
⭐ Good to know:
You can’t “break” a Roku during setup. If something goes wrong, you can always unplug it, plug it back in, and repeat the steps.
Wrap Up
Your Roku Streaming Stick is now set up and ready to use. Your next best move is to add Tubi, start browsing, and keep this“where to watch” guide bookmarked for the moment you want more free options beyond your first app.
If dialogue sounds quiet or buried once you start streaming, you can usually fix it with a few free settings changes—no new equipment needed.
And if you’re thinking about buying a second device for another TV (or you’re still deciding), this comparison will help you choose fast.